Garage Door Framing & Opener Wiring Diagrams


Behind every functional garage door is a well-built frame designed to bear the load and ensure smooth operation. Whether you’re getting ready to have a new door installed or an old one replaced, understanding garage door installation diagrams can help you pick the right model and ensure proper installation.
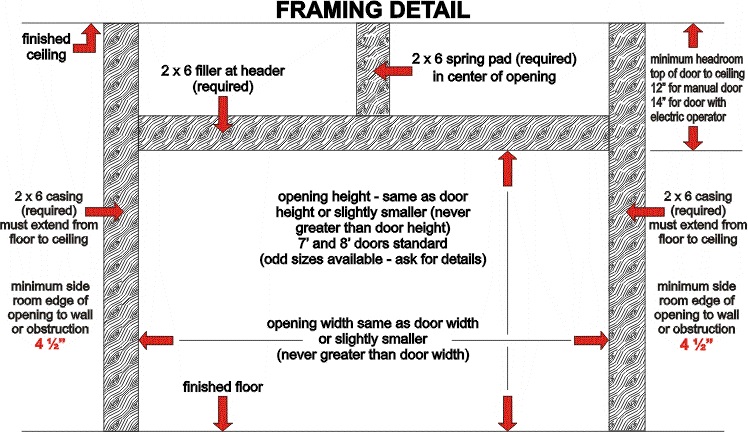
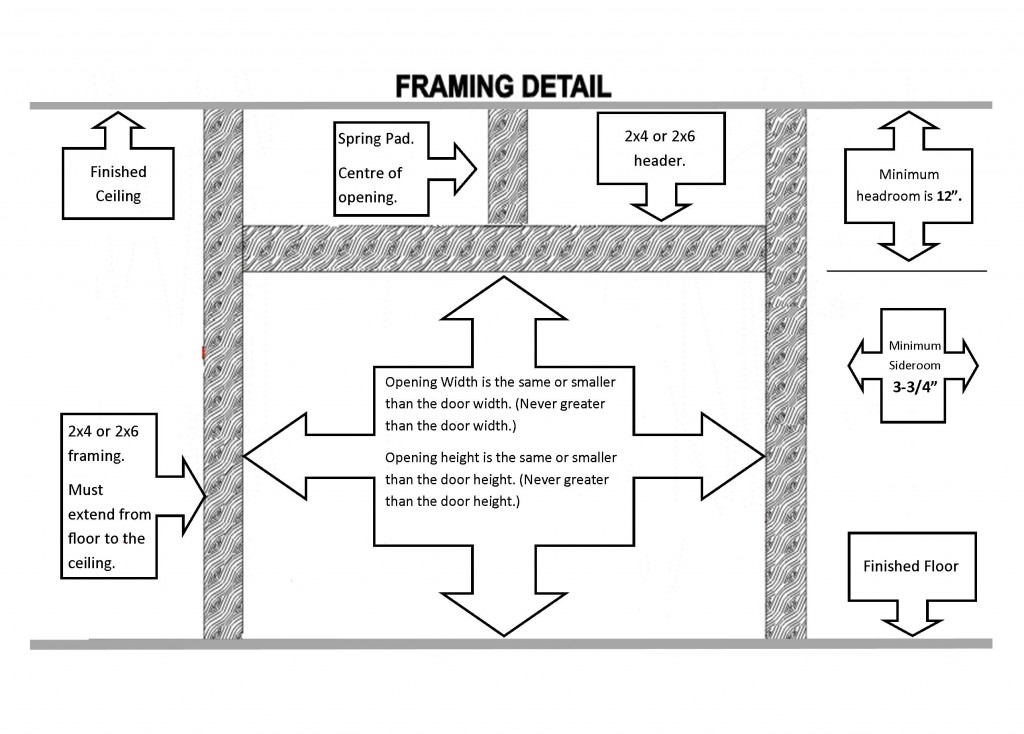
A garage door framing diagram illustrates the framework needed for proper installation. It serves as a guide, allowing you to install a quality door that keeps your home safe, functions well and lasts for several years.
There is no globally accepted standard garage door framing diagram. Diagrams often differ based on specifics like dimensions, style and number of doors. However, several components are integral to every diagram:

Before measuring out your garage door opening, you will need to know the width and height of your door. These dimensions will help you calculate your rough opening, which should be several inches larger than the garage door to accommodate the framing lumber. You can use a garage door framing diagram during the rough opening construction stage to ensure accuracy. A good practice is to make your header space 9 inches longer and 1 ½ inches higher than your door.
Much like measuring the rough opening, framing depends on the details of your garage door drawings. Following the diagram is essential for a safe and smooth installation.
Before you start the framing process, make sure you have high-quality materials and tools, including:
To start framing:
Some of the most common framing mistakes that new builders and DIYers make include:
When installing a garage door, it is always safer to trust experience and expertise. Since 1976, Garage Door Specialists, Inc. has been installing premium garage doors from leading manufacturers. Our team can help you install an aesthetically pleasing door that will last.
Before you begin framing, you will need a door that matches your vision for your home. Use the Clopay Quick Draw tool to design a door that will fit your home. This design tool allows you to create a door in six simple steps. The final drawing will provide essential building information, like the number of door sections and the panel height.
Simply enter your desired height and width measurements. Depending on your area’s weather conditions, you can also select the wind code. Then, choose a door collection, construction type, design, top section and glass type.
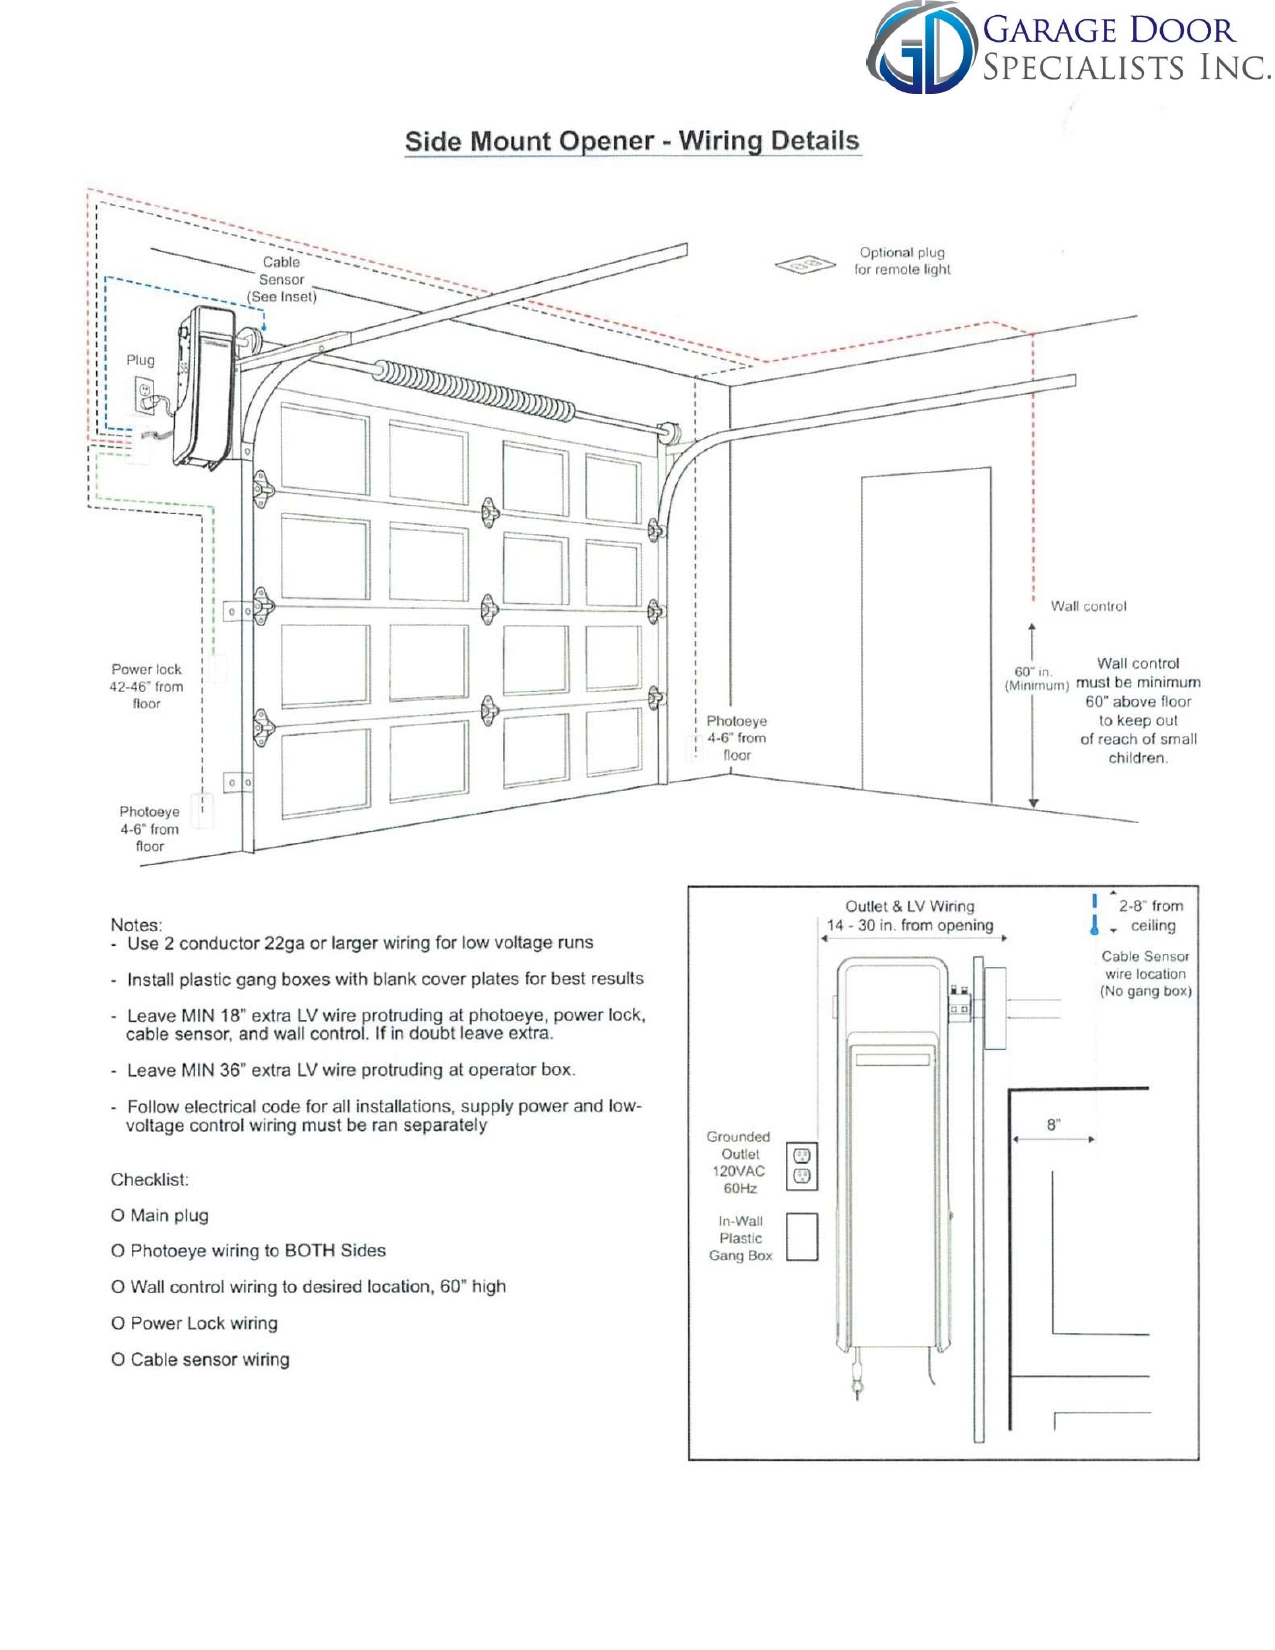
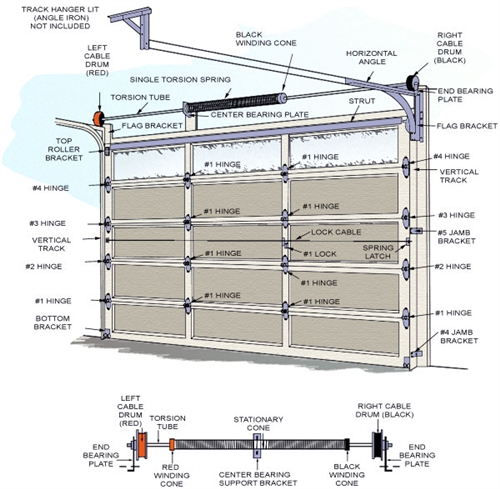
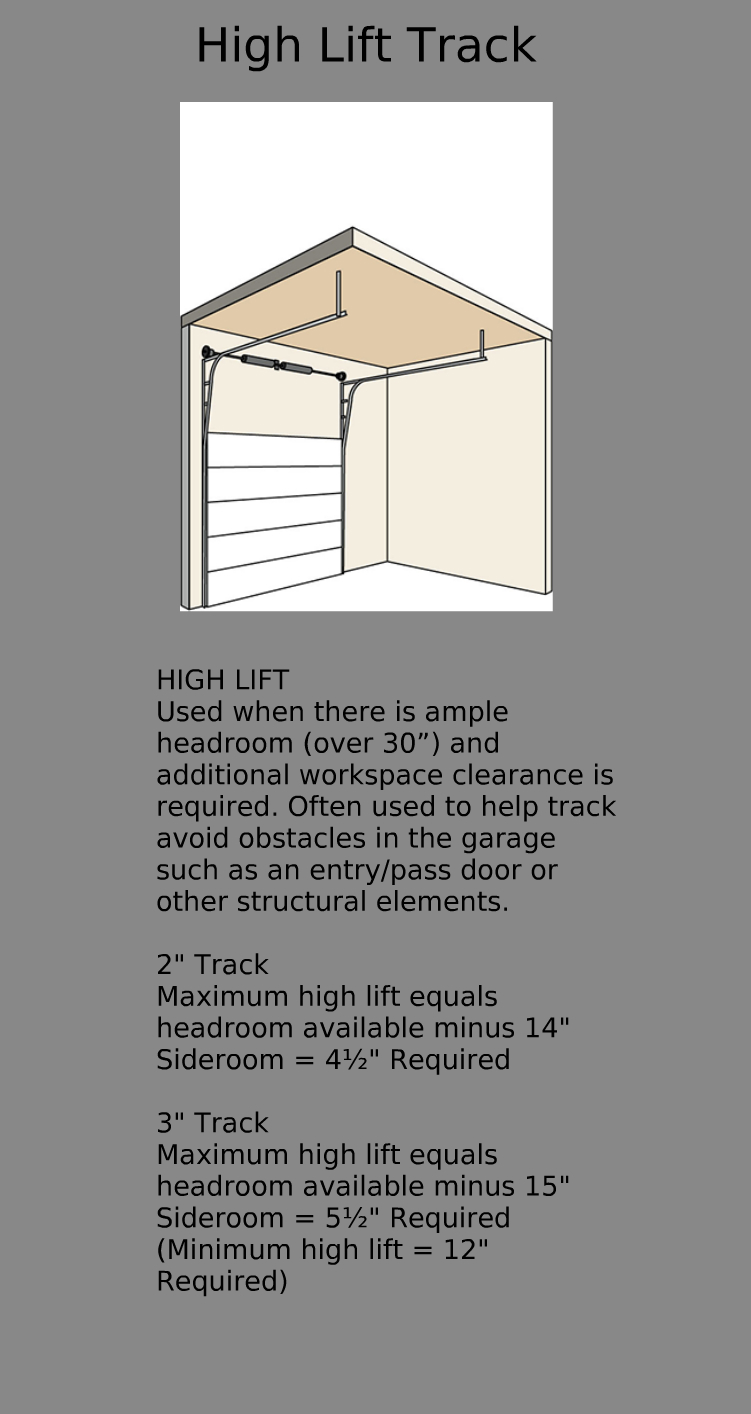
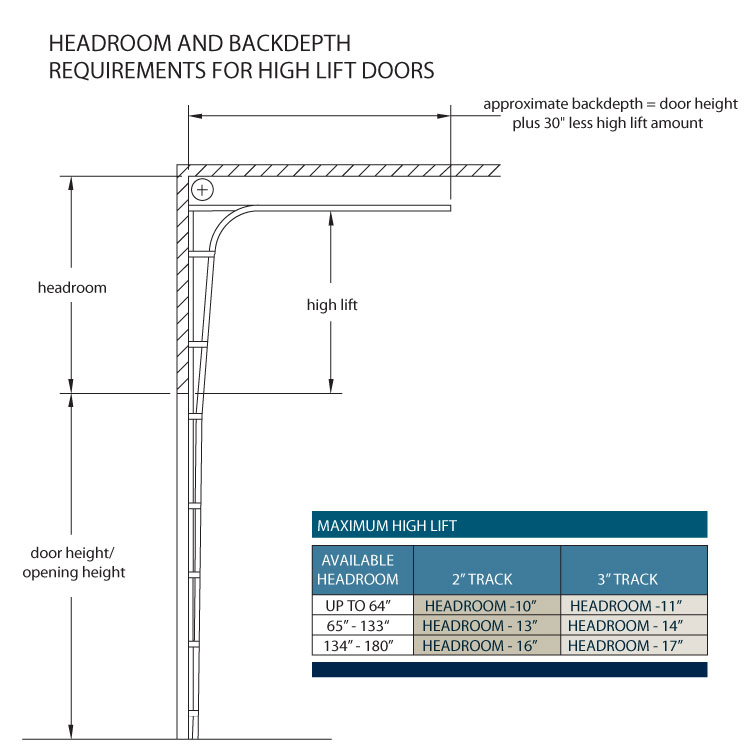
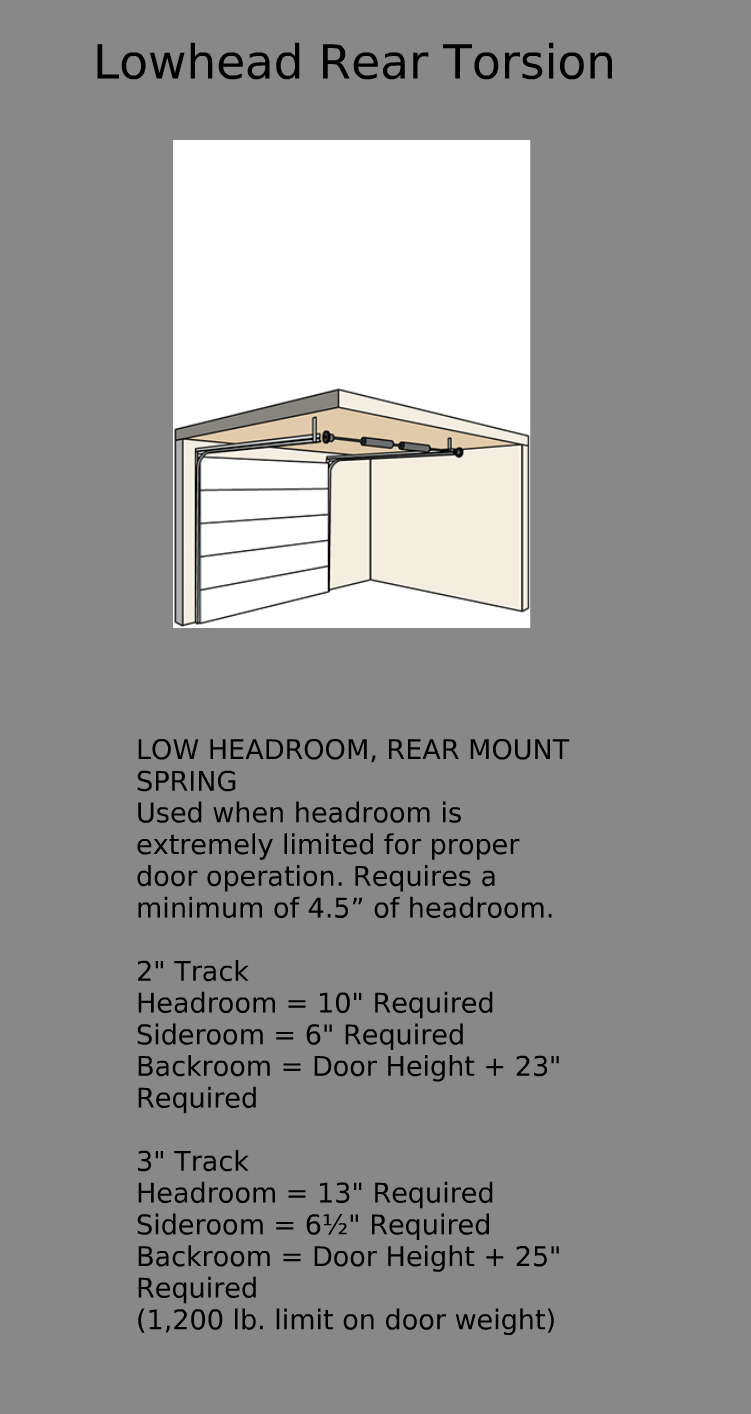
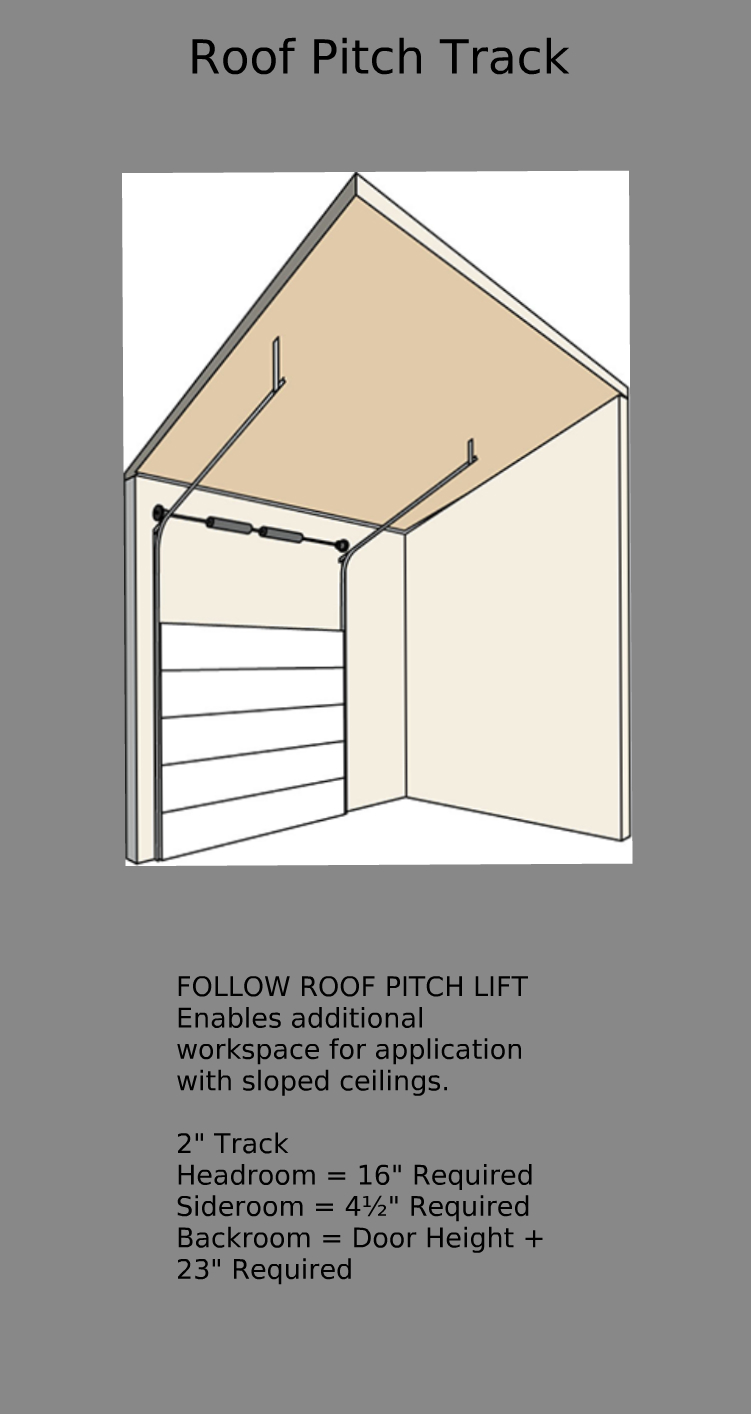
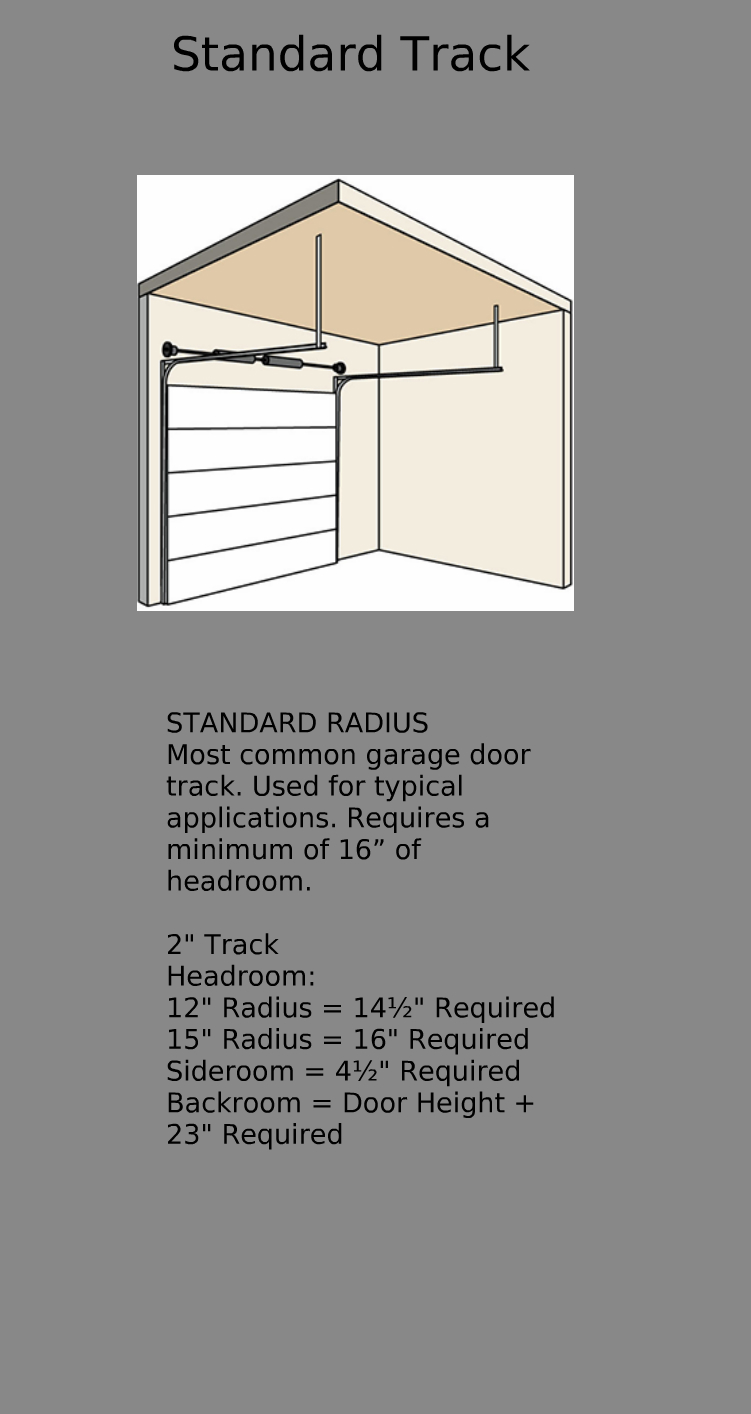
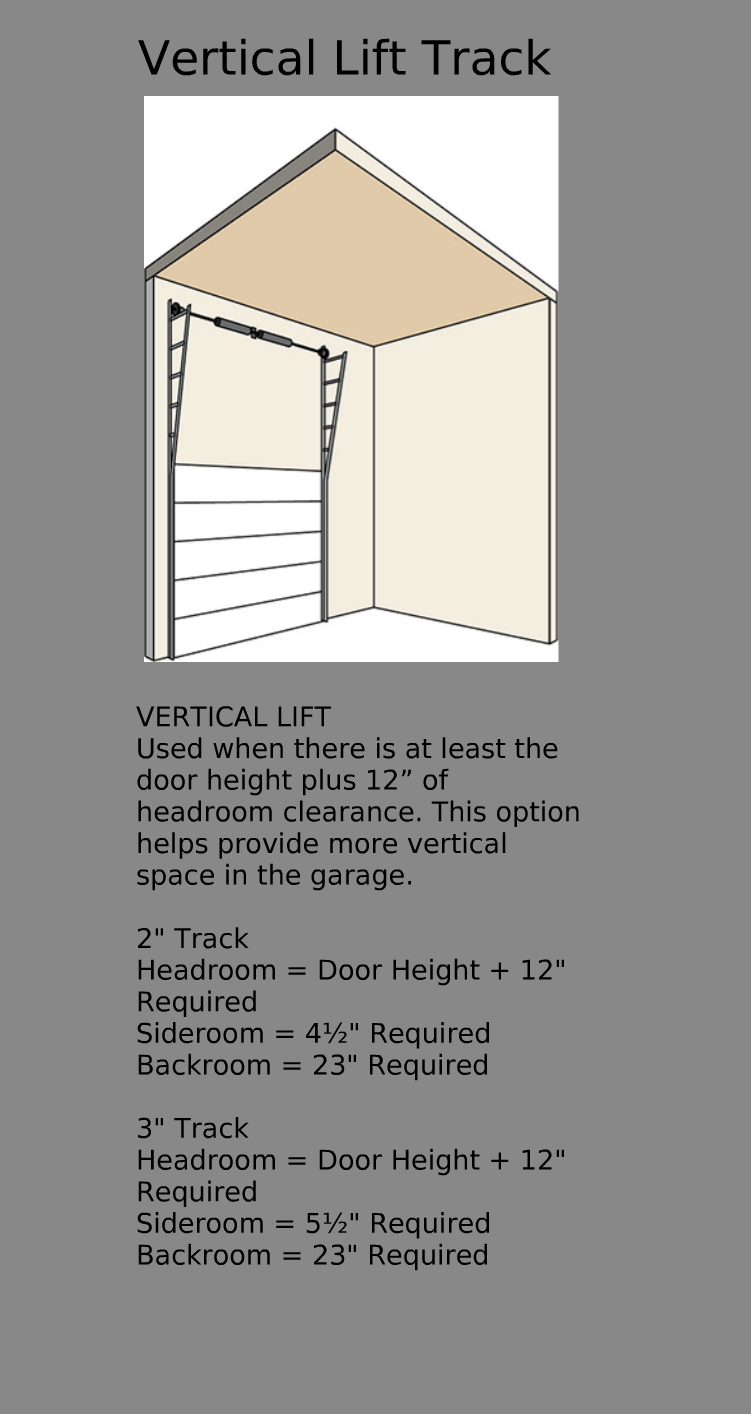
If you need a professional garage door installation team, give us a call. Our certified installers can help you select and install a door that enhances and safeguards your home. Request an installation service today. Garage Door Specialists in Morganton, NC recommends Liftmaster garage door openers, and we provide framing details for garage door installations. These diagrams also illustrate the different types of track systems available for various door styles. Talk to a garage door expert today!